01Use the route as a comparison plan
Maple Island and its introductory quests come before this route. Once you reach Victoria Island and make your first advancement at level 10, choose a training area that your current attack can clear comfortably. You do not need to travel every time another level appears beside your character.
The map and monster suggestions below are adapted from Nia Meow’s October 23 Global Classic World map guide, with Ant Tunnel III checked against its map detail page. The level bands are community training suggestions, not hard map-entry limits or a fastest-leveling claim. Equipment, class, hit rate and other players can change which map works for you.
Start by comparing two nearby choices. If the harder target causes frequent misses or long recovery breaks, stay on the easier target while improving the specific weakness. Reaching the top of a row does not mean the map suddenly stops being useful.
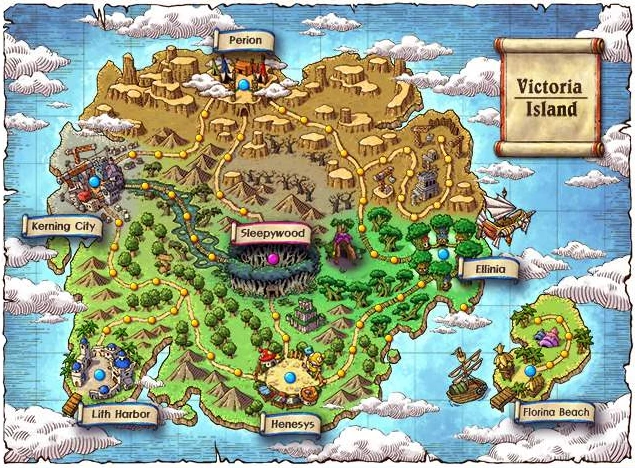 View full-size image
Official Victoria Island overview. The guide below names training areas; this artwork does not mark a portal-by-portal route.
Nexon · Official launch notes02Levels 10–20: establish a reliable attack
Use early quests while building your first-job skills. For grinding, a simple target mix helps you see whether the attack, accuracy and supply budget are working together. The dominant monster's level is a useful warning about difficulty, not permission to ignore weaker or stronger monsters mixed into a map.
The source groups Transfer Area near the end of the teens because its Stirges are level 20. Test a few encounters before committing a full session. If they take too many attacks or are difficult to hit, return to a map you already clear reliably.
| When to compare | Map and area | Main target or reason to try it |
|---|---|---|
| Around 11–15 | Line 1 <Area 1> · Kerning City Subway | Bubbling, level 15; a single-monster option in the source. |
| Around 11–15 | Tree Dungeon, Forest Up North IV · Victoria Road | Mostly Green Mushrooms, level 14, with Slimes mixed in. |
| Approaching 20 | Transfer Area · Kerning City Subway | Stirge, level 20; compare the compact layout with your current map. |
| At 21+ | First Time Together · Kerning City | A group alternative with puzzles and a boss, rather than an ordinary grinding map. |
03Levels 21–30: compare the Ant Tunnel choices
Ant Tunnel III has two listed monster types: level-22 Horny Mushrooms and level-24 Zombie Mushrooms. Its map page connects it to Ant Tunnel II and Ant Tunnel IV. That limited mix makes it a useful place to compare a repeatable loop before moving deeper into the dungeon.
Deep Ant Tunnel I offers a broader mix, including Evil Eyes and higher-level Jr. Boogies. It can remain useful as you advance, but the unexpected monster is part of the cost. Do not treat every spawn as equally easy simply because the route lists the map for your current bracket.
Ant Tunnel Park combines Evil Eyes with the familiar mushroom types and has a potion seller on the map in the source directory. That can reduce resupply travel. The Cave of Evil Eye III is another option when you specifically want a more focused Evil Eye session; the source still notes a timed Jr. Boogie spawn there.
| Map | Targets to expect | Reason to compare |
|---|---|---|
| Ant Tunnel III | Horny Mushroom 22 / Zombie Mushroom 24 | Two-monster loop; useful when you want a consistent training sample. |
| Deep Ant Tunnel I | Mushrooms / Evil Eye, with Jr. Boogie in the mix | A longer-term option if the stronger mixed spawn is manageable. |
| Ant Tunnel Park | Mushrooms / Evil Eye 27 | Resupply convenience and a transition toward Evil Eyes. |
| The Cave of Evil Eye III | Mostly Evil Eye 27, plus a timed Jr. Boogie | Compare a focused target mix against the busier Ant Tunnel maps. |
04Check matching quests before a dungeon session
Ant Tunnel III’s database page lists several quests that progress on its monsters. If you have the relevant quest and prerequisites, the same kills can advance that objective while you train. Check the quest log before the trip rather than assuming the monster counter will be credited retroactively.
Examples listed on that page include Jane and the Mushroom from level 20 for 30 Horny Mushrooms, Arcon’s Blood? from level 21 for 75 Zombie Mushrooms, and Dr. Faymus’s Request from level 22 for 40 Horny Mushrooms. These are reasons to inspect your available quests, not a promise that every character at that level has already unlocked the entire quest chain.
05At 30: advance first, then test the next area
Return to your instructor for second-job advancement at level 30. New skills can change the number of attacks per kill, your ability to group targets and the cost of a session. Re-test the old map with those skills before buying gear solely to chase a harder target.
The community route next compares Line 2 <Area 1> in Kerning City Subway for level-34 Jr. Wraiths, with Line 1 <Area 2> as another Jr. Wraith option. The Burnt Land V offers level-32 Fire Boars outside the subway, mixed with Lupins and Dark Axe Stumps.
Choose using the attack you actually have now. A freshly advanced character may not yet have the skill ranks assumed by a later second-job build. Staying on a familiar mushroom or Evil Eye loop while those skills develop is a valid result of the comparison.
06Measure the whole session, including supplies
The source’s maximum EXP-per-hour table is a spawn ceiling: it assumes monsters die immediately as they appear. It is not a recorded player rate. The map detail page also identifies uncertainties in spawn-rate modeling, so copying those large numbers into a guaranteed route would be misleading.
For a practical comparison, record your EXP before and after equal-length sessions. Keep the party conditions similar and include ordinary walking, looting and resupply time. Note potions used, frequent misses, and whether another player is already occupying your intended loop. A quieter alternative can outperform the highest theoretical entry for your character.
Pick two manageable nearby maps
Use the route to choose candidates, then test that you can hit their main monsters without repeated recovery stops.
Use the same duration
Compare, for example, two ten-minute sessions. Measure actual EXP gained rather than the maximum displayed by a database.
Include the cost of staying there
Record supplies and return trips. Keep the map that gives sustainable progress for your current budget and play style.
FROM THE SOURCE
Sources & updates
Content reviewed Oct 28, 2026. This AI-assisted guide is based on the published sources below, not first-hand gameplay testing. Source access dates are separate from the review date; later updates may change these details.
How we research and update guides · Report a correction
- Nexon: Grand Launch Release Notes — first and second jobs, Maple Island and KPQ Accessed Oct 28, 2026
- Nia Meow: Best Grind Maps for Every Level — community map comparisons and model limits (October 23) Accessed Oct 28, 2026
- NiaMeowDB: Ant Tunnel III — monster levels, connections and quest objectives Accessed Oct 28, 2026
Independent, unofficial guides. Not affiliated with or endorsed by the games’ developers or publishers. All game names and official images belong to their respective owners.